Tuesday 23 October 2012

p/hop and MSF

So a while ago I set (and blogged about) an intention to donate a pattern to p/hop to raise money for MSF.  As I have been in the 12 shawls in 2012 challenge on Ravelry it made sense to write a shawl pattern, and here is a dodgy picture of the finished article being blocked:
 
I still haven't managed to get a decent picture of the shawl, it has been a miserable mix of rain and fog for the last week or so and my photography skills are pretty basic so I've left 'final pictures of fabulous shawl' on the to-do list for the time being!  Besides, over the next week I plan to offer the shawl on the free pattern testers forum on ravelry so I'm hoping if all else fails at least there will be some decent pictures available to me there!
The pattern itself is just about written up and is inspired by Aoibhe Ni's tunisian shawls, although it uses shorter linked stitches so I could get around the corners.
Hopefully it'll raise some much appreciated funds for an amazing organisation.
 

Hopscotch cowl


Well it's been a while since I posted on my blog but I have been busy creating in real life!  First things first I have written and published my first pattern for sale.  For the princely sum of £2 you can purchase the pattern for hopscotch cowl on Ravelry.  I'm quite proud of myself and did a slightly embarrasing little dance round the room when I sold the first copy!
It uses post stitches, chevrons and a slightly lacy middle section as well as chunky buttons to give it a solid textured feel without being too heavy.

Tuesday 26 June 2012

top banana hairbands

In my continued quest for things to sell on my first craft stall I have come up with a number of patterns that don't take too long to make or use up acres of yarn.  I figured these two points would be essential if I want to sell anything and make a bit of a profit - there's not many people at a local craft fair who'd be prepared to pay for an intricately stitched, time consuming thingamibob costing £20, £30, £40.  So I raided my scrap-bag and found this lovely boo sock yarn I bought from babylonglegs last year to make some socks for my son.  I then raided my daughter's room for some unused (because she still doesn't have enough hair for them!) hair elastics and got to work!  These take about 20 minutes to make and can be adjusted in length/width as needed.


You will need a 4mm hook and some left over yarn (this is sock yarn but I've also used aran with a larger hook, works out fine)

1.  Join yarn around hair elastic with a slip stitch, ch1, make 7 sc stitches across, ch1, turn
2. sc across, ch1, turn
3.  Sc in first, 2 sc in next, sc in next 3, 2sc, sc in last, ch1, turn
4 - 65: *sc, ch1, sk 1* across, sc in last, ch1, turn
66: sc, sc2tog, sc in next 3, sc2 tog, sc, ch1, turn
67: sc across, ch1, turn
68: work a final row of sc around hair elastic, bind off and weave in ends.

(For personal use only)

Wednesday 6 June 2012

MSF and p/hop

I found out about www.p-hop.co.uk at a local Ravelry event a few years ago and as well as publishing patterns on my blog, it has always been at the back of my mind to donate a pattern or two.
For those who haven't heard about p/hop, it is a brilliant idea :)  Basically you choose a pattern from the site to download and then decide how much you think the pattern is worth and donate the money.  The money goes to MSF to support their fantastic and vital work.
So the plan is to work on an idea I had for a shawl based on a large shell pattern.  Once I am happy with it I will submit it and post about it on here.  Watch This Space!!  (Although not too closely, I'm not the fastest worker!!)

Narrowboat hearts

I came up with these a while ago after my mum asked me to make her something small for her narrowboat.  They are made in worsted cotton with a 4mm hook and can be stuffed with fluff or with lavender or other dried scented herbs.  Although I've not tried it I imagine they'd also work well with a drop or 2 of essential oil (although the oil might affect the colour of the cotton so try it at your own risk!  For my hearts I suffed with fluff and made a pocket within the fluff to fill with lavender.
You will need: 4mm hook, worsted weight cotton and fibrefill to stuff.

Make 2 small and 2 large hearts before binding together and stuffing.

Small Heart (make 2)
1. Ch2, sc in 2nd ch from hook, turn.
2. Ch1, 2sc, turn
3. Ch1, 2sc in each st, turn (4)
4. Ch1, 2sc in 1st st, sc across, 2 sc in last st, turn (6)
5 + 6: Repeat row 4
7: Ch1, sl st in 1st st, sk 1, 5dc in next st, sk1, sl st in next 2 st, sk1, 5 dc in next st, sk1, sl st in last, turn.
8: Ch1, sc, 2hdc in next 4 st, sc, sl st 2tog, sc, 2hdc in next 4 st, sc in last.  Do not turn.
9: Work sl st evenly around edge of heart.  When you get to the gully (centre dip) at the top of the heart work sl st 3tog, sl st to end.  Fasten off and weave in ends.

Large Heart (make 2)

1. Ch3, hdc in 3rd ch from hook, turn
2. Ch2, 2hdc, turn
3. Ch2, 2hdc in both st, turn (4)
4. Ch2, 2hdc in 1st, hdc across, 2hdc in last, turn (6)
5 + 6: Repeat row 4
7: Ch1, sl st in 1st st, sk1, 5dc in next, sk1, sl st in next 2, sk1, 5dc in next, sk1, sl st in last st, turn
8. Ch1, sc, 2hdc in next 4, sc, sl st 2tog, sc, 2hdc in next 4, sc in last.  Do not turn.
9: Work sl st evenly around edge of heart. When you get to the gully (centre dip) at the top of the heart work sl st 3tog, sl st to end. Fasten off and weave in ends.

Construction

Starting with the 2 large hearts and beginning at the gully (centre top dip): Sl st in BLO through both hearts around to join together.  When you get to the last section, stop and stuff with fluff/lavender etc, continue in sl st BLO to join hearts.  Do not fasten off!
Work ch3 and holding the 2 smaller hearts together begin sl st BLO at points of bottom of smaller hearts.  Sl st BLO around to gully, work ch 20 and rejoin with a sl st in same st as last one worked to form a hanging loop (this can also be left out or the length of the chain altered depending on what is required), continue in sl st BLO until a small gap remains, stuff with fluff/lavender and continue sl st BLO to starting point on smaller hearts.  Fasten off and weave in ends :)

Thursday 24 May 2012

long weekend afghan

This is another project I've been working on.  My middle son loves neon orange and is still at an age where he likes me to make things for him and has been waiting patiently for a blanket.  I have no patience for huge time consuming projects (I have been working on a blanket for my eldest for over a year now!) I have gone for cheap and cheerful acrylic yarn and a big hook!  This blanket could be worked over a long weekend (jubilee, anyone?!) and would be fine as a throw, or a picnic blanket, or a camping blanket...
This is a recipe more than a pattern (partly because it's not quite finished yet!) tha can be adjusted in size easily by changing the length of the starting chain (which must be an even number for the stitch pattern to work) and number of rows worked.
I'm a lazy so and so and put off or avoid sewing in ends wherever I can so I've written this pattern for minimal end sewing ;-)
Finished size will be approx 44" x 54", yarn used is stylecraft special double knit in graphite grey, neon orange and green.  200g orange, 200g green, 1700g (?) grey.  Four strands worked together throughout.
10mm hook.

1. Ch92, sc in 2nd ch from hook and across, turn.
2-9: ch1, sc in first, *ch1 sk1, sc in next st* across, turn
10: ch1, sc in first, *ch1 sk1, sc in next st* across, in last sc change colour to orange but do not break grey yarn!
11: ch1, holding orange yarn tail along top of stitches and working over the top to secure it in place, work a sc in each sc and ch1 space across, turn.
12: ch1, sc across, in last stitch pick up grey again, turn.  Cut orange leaving 6" tail
13: ch1, holding orange yarn tail along top of stitches and working over the top to secure it in place, sc across, turn
14-21: ch1, sc in first, *ch1 sk1, sc in next st* across, turn
22:  ch1, sc in first, *ch1 sk1, sc in next st* across, in last sc change colour to green but do not break grey yarn!
23: ch1, holding green yarn tail along top of stitches and working over the top to secure it in place, work a sc in each sc and ch1 space across, turn.
24: 12: ch1, sc across, in last stitch pick up grey again, turn. Cut green leaving 6" tail
25:  ch1, holding green yarn tail along top of stitches and working over the top to secure it in place, sc across, turn
Repeat rows 14-21
Repeat rows 10 -25
So that the coloured stripes alternate.  For my blanket I worked 5 orange and 4 green stripes.  After the last orange stripe work another grey section but make the last row all sc. 
Ch1, turn, sc across, work 3sc in first corner.  Turn and work down the long edge of the blanket working a sc in each row end and working over the grey yarn where it was carried over.  Work 3 sc in corner, and then sc across bottom of blanket.  Work 3sc in corner and sc in each row end up the long side.  Work 3sc in corner and join with sl st and fasten off.  Weave in ends.

Yoga socks #2

So I finally got around to putting the basic idea in my head into woolly reality!

While working on these I also came up with a few ideas for a proper sock pattern using a similar flo/blo construction...  more on that another day!

This sock is made with colinette jitterbug 'lagoon' and uses around 50g (and probably a lot less!  My scales are broken...) and 3.75mm hook.  Pattern is in US terms :)  The sizing is pretty flexible, my feet are  UK size 5 and these have good clearance for my heel and toe.  The foot and leg section are easily adjusted by changing the length of the starting chain (mine works out as 15 ch for leg section, 15 ch for foot section, plus 3 ch for the missing heel section plus 1 ch for turning ch)

(apologies for the poor quality pic, I have never tried photographing my own foot before and it hasn't really worked!!)

LDC - linked double crochet.  Instead of wrapping the yarn over before pushing through the stitch, the hook goes through the horizontal bar in the centre of the previous st, pull up a loop, hook through the top of the stitch in the row below, pull up a loop, yarn over and pull through 2 loops on hook twice.  (For the first st, work by going through the second chain from the hook, pull up a loop, then through the top of the stitch in the row below, pull up a loop and yarn over through 2 loops on hook twice.) 

* If you would like both seams to the inside of the foot, when sl st together make sure to do the sl st the opposite way (by folding in the other direction!) for the second sock.   Sl st can be worn to the inside or outside of the sock, whichever is more comfortable.

1. Ch34, sc in 2nd ch from hook and each ch across, turn (33)
2-16: ch1, sc in back loop only across all stitches, turn

Leg section
17:  ch1, sc in back loop only in first 15 stitches, turn (leave remaining unworked)
18-38: ch1, sc across in back loop only, turn (15 st)
*Sl st together working in bottom  bumps of chain and back loops.  Break yarn.

Foot section
1.Rejoin yarn by skipping 3 stitches on row 17, rejoin in back loop only and work sc (blo) across to end of row, turn (15)
2-5: ch1, sc in back loop only, turn
6-15: ch2, LDC in in front loop only in each st across, turn
16-20: ch1, sc in back loop only across, turn
*Sl st together working in bottom bumps of chain and back loops. Break yarn.

Weave in ends and wear :)

Wednesday 16 May 2012

orange tip butterflies

We've had a few of these bouncing around the garden :) This one stopped off to feed on one of the red campion flowers on one of the rare days when the sun shone.
When I started this blog the idea was to keep a record of the goings-on at the allotment, mainly because I am hopeless at remembering where I planted things and what varieties I planted, how well they did and so on.  Needless to say, this has yet to happen!  I vaguely recall planting charlotte potatoes this year, and carouby de mausanne (may have spelt this incorrectly...) peas.  Everything else was just what was to hand and deeply disorganised!
On the plus side I am as committed as ever to organic gardening principles and having read several articles on the effects of neonicotinoid pesticides on bees that have been published of late, I am determined to continue and ramp it up a notch by trying to find an alternative flea treament for the cat...
Anyway, my point is butterfly numbers, bee numbers, all kinds of animal numbers are falling at an alarming rate and it is a relief to see a small population of orange tips keeping a toehold in the neighbourhood.  I will be putting in some lady's smock in the garden to help them along a bit more!

We also have a new frog who has taken up residence in the old belfast sink we made into a dragonfly pond last year - just need to sort out the pondweed!

Tuesday 15 May 2012

Stray skeins

...I might have a few.  And there's never quite enough for the project I have in mind, or they are not what I expected when I start to work them up.  This is what happened yesterday, after I went stash diving.  I found a skein of Artesano Hummingbird in dk, gorgeous soft yarn that just doesn't work well in crochet as the colour runs are too short and pool terribly.  I have 2 skeins but started with 'woodpecker', a mix of orange, lime green, a magenta-ey red and cream...  a challenge to say the least!

I started off trying hitchin a ride by Sharon Cheek which is a lovely simple (US) single crochet-based pattern that Did Not Work.  I will be revisiting the pattern with a slightly more sedate colour in due course!
I then moved onto string along scarf by Kathy North but the colours ended up too blocky again :(  Nevermind, I have a stray skein of Elvincraft's yarn that will look lovely in that pattern.

Then I had my lighbulb moment and dug out a 6.5mm tunisian hook and got on with it...  Success!! 
I started off with ch30 and stuck to tunisian simple stitch.  The colour runs are looking much more knitted  and I will post pictures when finished.
While in a tunisian mood I may also work up a sister cowl with a more openwork pattern, but more on that another time!

(As promised here is an in progress pic!)

Tuesday 24 April 2012

Birch Bark cowl

A while ago I ordered a lucky dip package from Fyberspates.  This lovely yarn is one of the skeins that arrived.  Although it wasn't labelled I'm fairly certain it's 'squishy yarn', certainly it feels like alpaca!
I'm waiting for some handmade wooden buttons to arrive and will post finished pictures as soon as!
I used a 52g skein (!) which I can't be certain of the meterage of so I would recommend having spare yarn on hand just in case...

You will need an 8mm hook and two 2cm buttons/3cm toggle buttons ( I got these buttons from sew Annie sew on Folksy).

This pattern can be adjusted to any size, just change the length of the starting chain: as long as the number of chains is divisible by 2 it should all work out fine...

Ch 46
1. sc in bottom of 2nd ch from hook and bottom of each ch across, turn (45)
2. ch1, (sc, ch1 sk1) across, turn.
3. ch1, sc in 1st st, (sc in ch sp, ch1, sk sc)across, sc in last 2 st, turn.

Repeat rows 2 and 3 for 9 more rows (or until cowl is size needed)

13. ch1, sc in each sc and ch sp across, 3sc in last st of row (do not break yarn!), turn to work across short edge, work 12 more sc evenly across (1 st in each row end), turn
14. ch2, LDC (linked double crochet) in each st across, turn
15-16: repeat row 14
17: ch2, hdc in each st across, fasten off.

Sew on buttons ready to go on the schoolrun!

Tuesday 17 April 2012

April Showers hat

I've resolved that this will be the year that I do a craft fair.  Yes it will.  And now I've written it down here it surely will come true.
In honour of this forthcoming event, I had a bit of a stash diving session and dug out all the yarns I had left over from cloth nappying days that never got worked up into longies and suchlike.  I found some Pixie Knits yarn I acquired from a friend, it has no label but I think the colour is Aria.  This is the hat I came up with:

It's based on a lot of other childrens hats I've made and increases in multiples of six stitches so it's quite easy to adjust the sizing by adding extra increase rounds following the formula!
5mm hook, 100g aran weight yarn
Size small approx 16" around (12+ months)
Size medium approx 17.5" around (18+ months)
Size large approx 19" around (2 years +)
(larger sizes bracketed round numbers)

1. Ch2, 6sc in 2nd ch from hook

Mark 1st st of each round with stitch marker, do not join rounds.  Work in back loop only (BLO)

2. (In BLO) 2sc in each st around (12)
3. (2sc, sc) around (18)
4. (2sc, sc in next 2 st) around (24)
5. (2sc, sc in next 3 st) around (30)
6. (2sc, sc in next 4 st) around (36)
7. (2sc, sc in next 5 st) around (42)
8. (2sc, sc in next 6 st) around (48)
9. (2sc, sc in next 7 st) around (54)
10. (2sc, sc in next 8 st) around (60) stop increase rounds here for the smallest size
11. (2sc, sc in next 9 st) around (66) stop increase rounds here for the medium size
12. (2sc, sc in next 10 st) around (72) stop increase rounds here for the largest size
11 (12,13) - 28 (30, 32) - sc around in BLO
In first st of next round sl st.  Fasten off and weave in ends.

Flower:

I'm a bit lazy and always looking for ways to avoid sewing in ends.  For the flower I used a technique I discovered while working up some afghan squares where at a certain point you work in the front loops before going back to work in the back loops.  If you leave a long enough tail before the slip knot there's even less sewing :)
This was made using the 5mm hook again

1. Ch2, 6sc in 2nd ch from hook, sl st in 1st sc to join.
2. Ch1, 2sc in each st around, sl st to join (12)
3. Ch1, (2sc, sc) around, sl st in front loop to join (18)
4. Working in front loop only, ch1 (sc, hdc), (hdc, dc,hdc), (hdc, sc) around to form the 6 smaller petals.  Sl st in back loop behind start of first petal to join.
5. In BLO (2hdc, hdc in next 2 st) around, sl st in 1st to join (24)
6.  Ch3, 2dc in same st, sk 1, sl st in next, (sk1, 5dc in next st, sk1, sl st in next) around, work 2dc in 1st st worked to complete the first petal.  Sl st in top of ch3 to join.  Fasten off, weave in.  Use the long tail to attach the flower to the hat.

This pattern is for personal use only, thanks :)


Tuesday 20 March 2012

Yoga socks # 1


Don't stop me now, I'm on a roll!  I made these yoga socks a while ago now and although I'm in the middle of making up yoga socks # 2, I think the first pattern is good enough to put up here!
This pattern is one size again, but can be tried on and adjusted as you go, feel free to adjust the number of rows in the cuff, the length of the chain at the start of the foot section, the number of rows...
I made these with about half a skein of jitterbug again, and with a 3.5mm hook.
(Make 2)
Cuff:
1: ch 19, sc in 2nd ch from hook and sc across, turn (18)
2-46: ch1, sc in back loop only across, turn.
Sl st together the back loop only and the bumps in the underside of the beginning ch.  Fasten off.
Foot:
1: Rejoin yarn in the end of the 15th row end, ch1 and sc in same st as join, work 1 sc in each row end for another 21 rows (22sc in total), ch27 (49)
2:sc in first sc of row one (the remainder of the sock is worked in the round), you might want to use a stitch marker here to mark the start of the round
3-22: sc around
continue to sc around until you are level with the first st again (usually 1 extra st for every 4 rows - I worked an extra 5 sc), sl st in next st, fasten off, weave in ends.

Springy socks


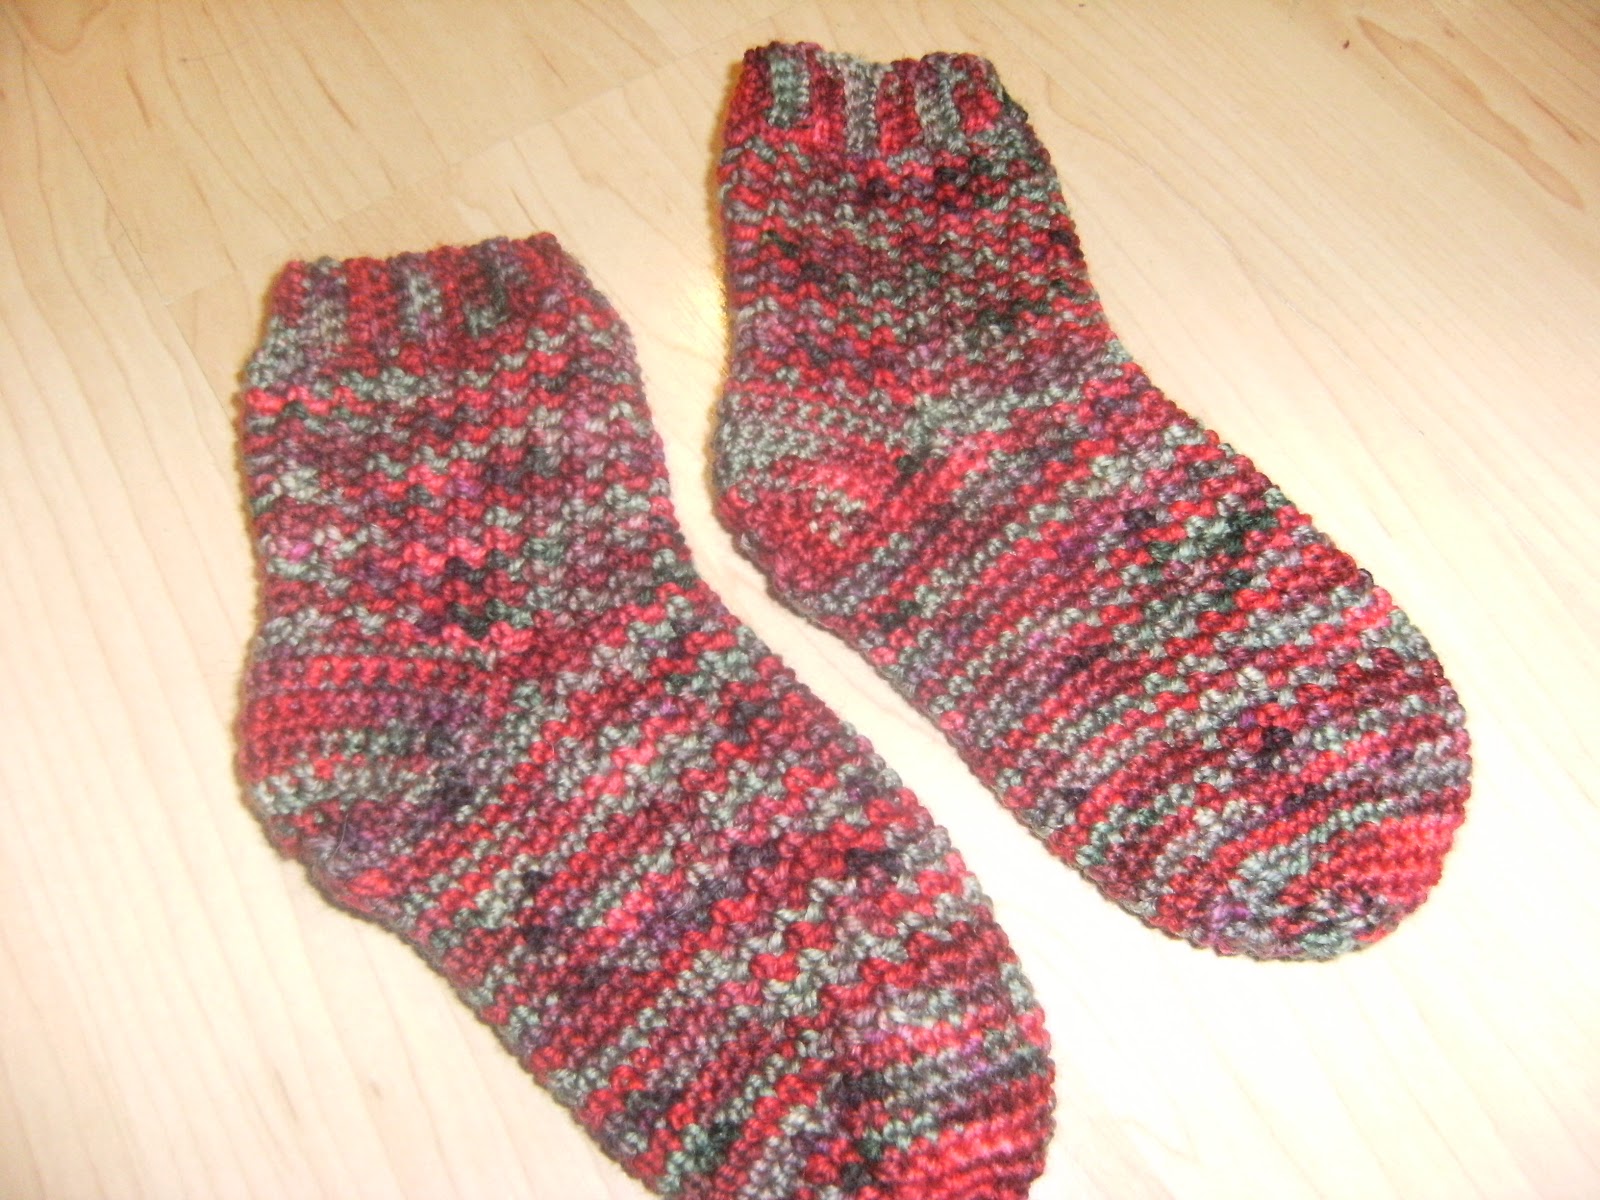
Having been promising since before Christmas, I finally got around to making up some new socks for my daughter.  She has quite small feet but this pattern can be adjusted quite easily, although be sure to end up with an even number of stitches at the start of the leg as if you work odd you will end up with granite stitch!  (This pattern is for shoe size UK 6).   Based on cuff down socks I've made previously, this is what I came up with:

I used about half a 110g skein of colinette jitterbug in raspberry and a 3.5mm hook (written in American terms).
(Make 2!)
Cuff:
1.Ch6, sc in 2nd ch from hook and across, turn (5sc)
2-30: Ch1, sc back loop only across, turn.
sl st together to form the cuff by working in the back loops and underside bumps of the starting ch. Do not break yarn!
Leg:
1: working along the edge of the cuff, work (sc in 2 row ends, 2sc in next) around (40sc)
2-16: Without joining rounds, work sc, ch1, sk 1, sc around for 15 rows.  Work (sc, ch1, sk1 sc) twic more to bring last st level with cuff seam.
Heel:
1: sc in next 20, turn leaving remaining st unworked
2-8: ch1, sc across (20 sc)
9: ch1, sc in 1st st, sc2tog, (sc in next 2 st, sc2tog) across, sc in lst st, turn (15)
10: ch1, sc in first 2 st, (sc2tog, sc) across, sc in lst 2 st, turn (11)
11: ch1, sc in first st, (sc2tog, sc) across, sc in last 2 st, turn (8)
12: ch1, sc2tog across (4)
Do not turn or break yarn!
13: ch1, work 11 sc up the side, work in pattern across pattern section (should be 10 repeats of sc, ch1, sk1) 11sc down other side of heel.  Leave remaining sts unworked, do not turn!
14: (no ch 1 as sock is worked in a round from here: you may want to put a stitch marker in first stitch of the round and move it up on each new round) sc across the 4 unworked sts, sc in 9 sts along side of heel, sc2tog in last 2 on side, work in pattern across, sc2tog at top of next side, sc in next 9
3: 2sc2tog, sc along side, work in pattern, sc along other side
4: sc2tog, work in sc/patt/sc around (40)
Foot:
5-24: work in established pattern around (40)
Fold sock to find central stitch on the sole, work round to this point and mark as first stitch of round
Toe:
1: sc in next 8 (inc. first marked st), sc2tog, sc, sc2tog, sc in next 15, sc2tog, sc, sc2tog, sc in last 7 st (36)
2: sc around
3: sc in first 7 st, sc2tog, sc, sc2tog, sc in next 13, sc2tog, sc, sc2tog, sc in last 6 (32)
4: sc in first 6 st, sc2tog, sc, sc2tog, sc in next 11, sc2tog, sc, sc2tog, sc in last 5 (28)
5: sc in first 5 st, sc2tog, sc, sc2tog, sc in next 9, sc2tog, sc, sc2tog, sc in last 4 (24)
6-7: repeat pattern
8: sc in first 2 st, sc2tog, sc, sc2tog, sc in next 3, sc2tog, sc, sc2tog, sc in last 1, slst in first st of next round, fasten off with a long enough tail to sew toe.